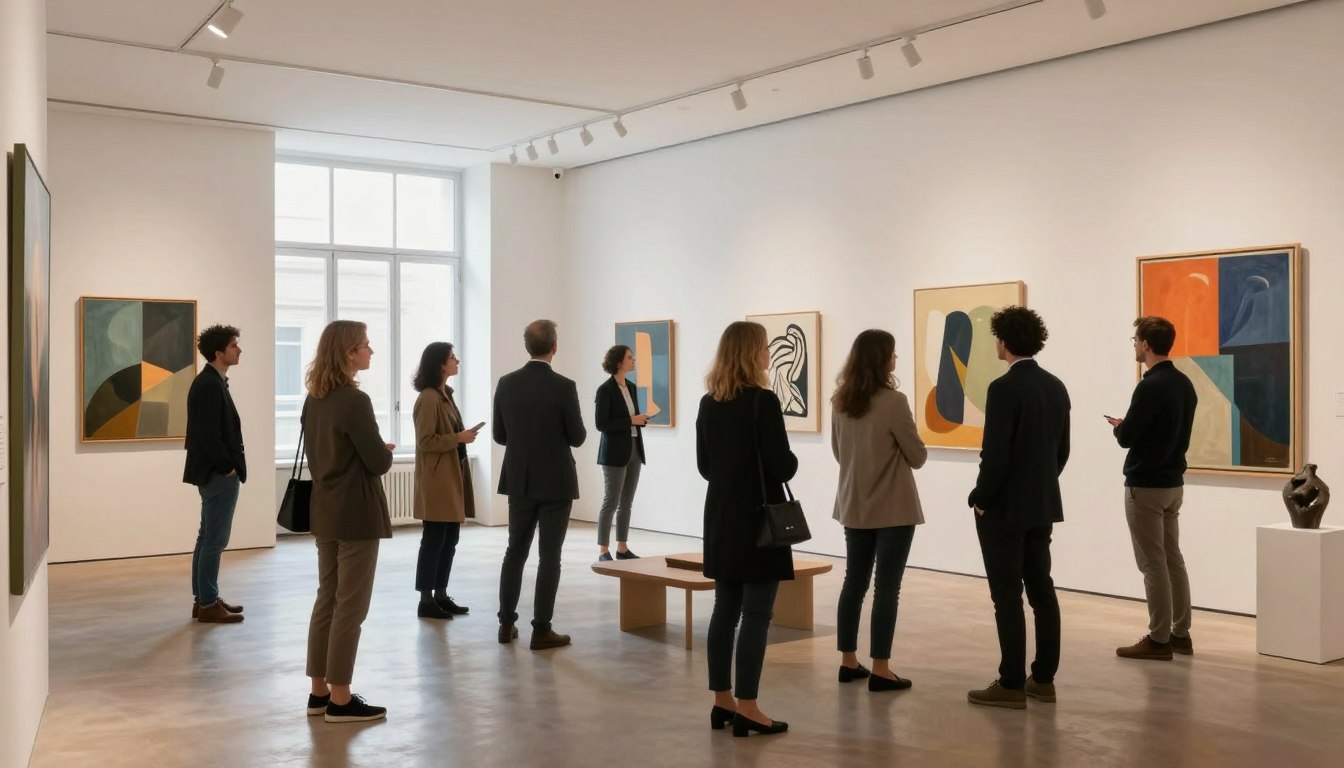
Turning a home into an art gallery starts with a key step. This is creating a detailed plan and map of your collection.
This process is more than just decorating. It aims to blend your art and home’s design seamlessly.
Experts like Fresh Paint Art Advisors start by listening carefully and analyzing your space. They walk through your home and study its layout and lighting.
This information is crucial for making your collection map. It guides how to choose and place your art in your home.
This careful planning creates a unified story in your home. It’s the key to beautiful, gallery-style interiors.
Wall Systems: Blocking, Cleats, Reveal Bases
Advanced wall systems are key to a gallery-quality look. They support artwork of all sizes and weights. This support is crucial for professional results.
Blocking uses solid wood or plywood panels between wall studs. It creates a solid mounting plane. This is vital for heavy or oversized pieces.
The Serenity residence shows how important blocking is. It allows for flexible placement and security. A perfectly level, immovable artwork depends on this hidden structure.
Cleat systems offer a different approach. A metal or wood cleat is mounted to the wall. A matching piece is fixed to the artwork’s back. This creates a secure hang without visible hardware.
This method is flexible. Artwork can be easily lifted on and off the wall. It’s perfect for collections that change over time.
Reveal bases add an architectural detail. A shallow ledge is built into the wall at the baseboard. Artwork rests against the wall, lifted slightly off the floor.
The effect is a clean, floating appearance that adds depth. It eliminates the need for floor-propping. This technique is a hallmark of high-end galleries.
The wall finish is the final, critical layer. The surface must complement the art without causing glare. A microtexture paint is often used for this.
This specialized finish has a fine, uniform grit. It diffuses light evenly to eliminate hotspots and reflections. The matte, tactile surface makes colors pop.
For specialized techniques on challenging surfaces, such as how to hang art on a concrete wall, consult expert resources. The principles of solid support remain constant.
Choosing the correct system depends on the artwork’s needs and the desired aesthetic. The following table provides a clear comparison.
| System | Primary Application | Key Feature | Best For |
|---|---|---|---|
| Blocking | Heavy-load mounting | Creates a continuous, solid backing within the wall cavity | Oversized canvases, heavy sculpture wall mounts, and permanent installations |
| Cleat Systems | Flexible, flush hanging | Allows for easy artwork removal and repositioning without damaging the wall face | Rotating collections, valuable pieces requiring periodic maintenance, and gallery walls |
| Reveal Bases | Architectural shadow-line detail | Creates a floating effect by lifting artwork off the floor on a recessed ledge | Leaner-style displays, sculptural objects, and settings seeking a minimalist, built-in look |
Each system solves a distinct presentation challenge. A professional installation often combines them. The goal is always security, flexibility, and an impeccable finished visual.
Lighting Approach: Track vs Trimless, CCT/CRI
The right lighting system is key. It guides our focus and shows off each artwork’s true beauty. In an art-focused home, light is a major design tool. It changes how we see things and sets up the space.
The Fresh Paint team’s work on the Serenity project shows this well. They made a sculpture in the dining room stand out. With the right light, it went from just a decoration to a must-see.
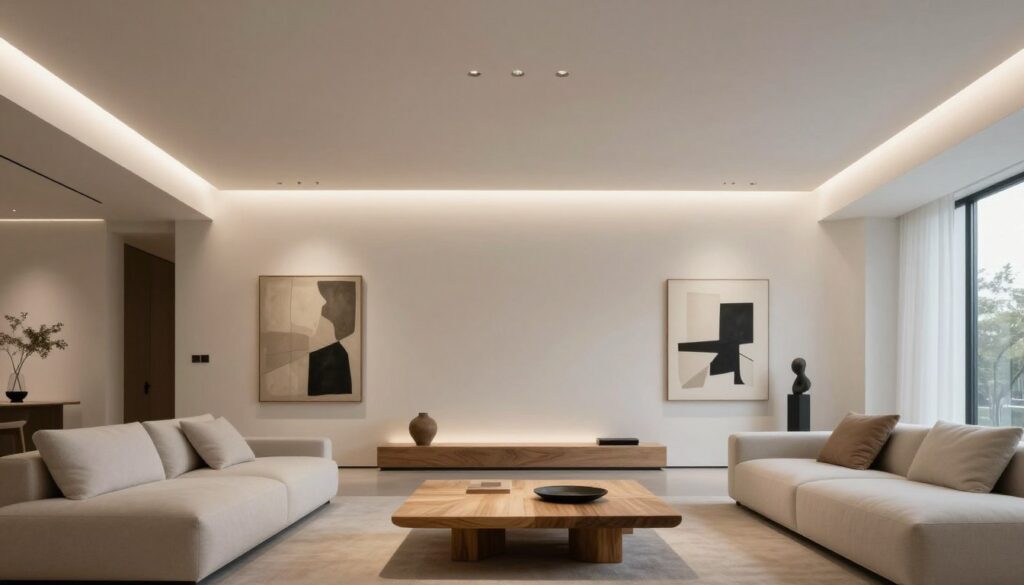
Choosing the right light is a big decision. Track lighting is super flexible. You can move the heads to show off different pieces.
It’s perfect for homes with art that changes often. On the other hand, trimless lights are recessed into the ceiling. They make the ceiling look clean and architectural.
Trimless lights don’t have visible edges. The light seems to come from the ceiling itself. This simple look lets the art take center stage.
Technical details are also important for great lighting. Correlated Color Temperature (CCT) shows the light’s warmth or coolness. It’s measured in Kelvins (K) and affects the room’s feel.
For most art, a neutral white light between 2700K and 3500K is best. This range keeps the colors true without adding yellow or blue casts. The Color Rendering Index (CRI) tells us how well colors are shown.
A high CRI means colors look real under that light. For top-notch lighting, a CRI of 90 or above is key. This ensures reds pop and we can see fine details.
Using trimless lights creates a smooth, unified look. It lets the art shine without the lights getting in the way. This works great in modern or simple homes.
Good lighting should highlight the art without drawing attention to itself. A good plan mixes technical skill with design. This makes a space where art is not just shown, but truly lit up.
Environmental Control: UV, Humidity, Security
Keeping an art collection safe for the long term is a big job. It’s not just about showing off the art. It’s also about fighting off invisible enemies like light, moisture, and unwanted visitors.
Ultraviolet light can make art fade and deteriorate. We must stop it. Using special UV-filtering films on windows is a must. For new buildings or big changes, using glass with built-in UV blockers is the best choice. This helps slow down the damage to art materials.
Keeping humidity levels steady is also key. If humidity changes, art materials can get damaged. A humidity control system for the whole house is the best way to keep things stable. It keeps humidity between 40-50%, protecting the art from harm.
Good security is the third important part. It’s more than just alarms. It starts with controlling who can get in. This includes using keyless entry, keeping track of who’s in, and setting off-limits areas for valuable art. Keeping the art safe is the main goal.
Having cameras that watch the art all the time is also important. These cameras can be seen from far away. Adding sensors to watch for changes in temperature, humidity, or water helps keep the art safe.
| System Type | Primary Function | Key Benefit for Collection |
|---|---|---|
| UV-Filtering Glazing/Film | Blocks ultraviolet radiation from sunlight. | Prevents fading and chemical degradation of artworks. |
| Humidity Control System | Maintains stable relative humidity levels. | Prevents cracking, warping, and mold growth in sensitive materials. |
| Integrated Security & Monitoring | Manages access, surveillance, and environmental sensors. | Provides physical protection and early warning for environmental hazards. |
These steps for security and humidity control make a safe space for art. It’s not just about keeping things nice. It’s about taking care of the art for the future. Keeping the environment right is essential for art preservation.
Furniture & Rugs as Frames
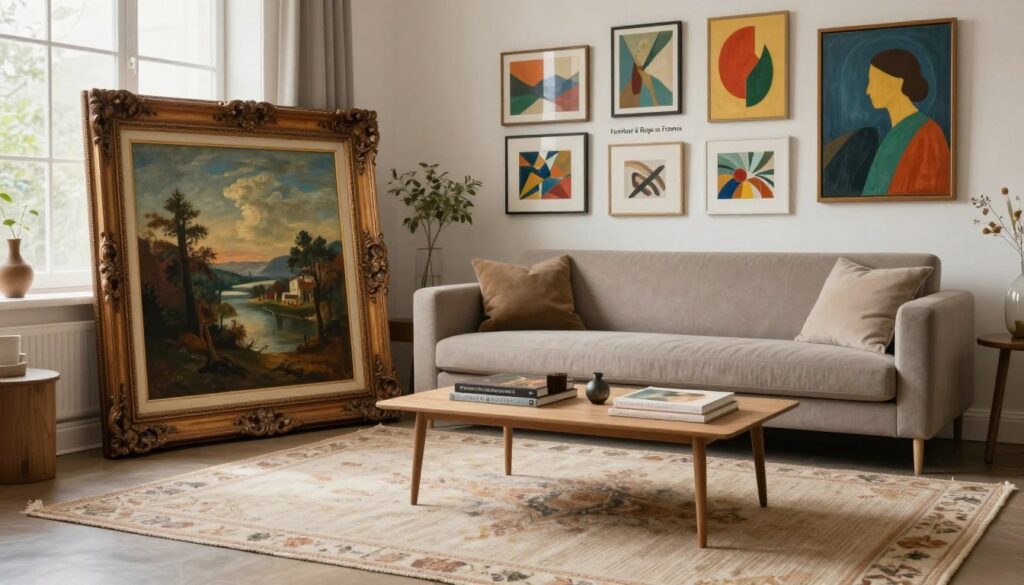
The way a room’s furniture and art work together is key to both beauty and preservation. Sofas, tables, consoles, and rugs act as frames. They help place art in the room and tell a story.
These objects are more than just furniture. They help create a story around the art. The goal is to make every piece work together.
Choosing the right size and shape is important. Big paintings need big furniture to look right. A low sofa lets you see art hung above without getting in the way.
It’s also important to think about where people will sit. You want them to see the art clearly. Rugs can help guide people to the art, making the room feel like a gallery.
What materials you use is also crucial for art conservation. Stuff near art should not harm it. Materials that release harmful chemicals can damage art over time.
Using the right materials helps keep art safe. It’s a way to protect your collection. This is especially important in a home that values art.
The following table outlines key material attributes to evaluate when placing furnishings near art:
| Material Type | Dimensional Stability | pH Level | Off-Gassing Risk | Suitability for Art Proximity |
|---|---|---|---|---|
| Solid Hardwood | High (if properly seasoned) | Neutral to slightly acidic | Low (with low-VOC finish) | Excellent |
| Engineered Wood | Very High | Varies | Medium-High (from adhesives) | Fair (require thorough off-gassing period) |
| Wool Rug | High | Neutral | Very Low (natural fibers) | Excellent |
| Synthetic Fiber Rug | High | Neutral | Medium (from backing & treatments) | Good (select low-emission products) |
| Glass or Metal | Very High | Inert | None | Excellent |
Following these tips makes a home that values both beauty and preservation. Furniture and rugs are more than just things to look at. They support and show off the art, making the home feel complete.
This approach makes a home where art is a part of life. It’s not just hung on walls. It’s lived with and cared for, showing respect for both the art and the home.
Storage, Logistics & Rotation
Any big art collection’s heart beats in climate-controlled vaults and detailed plans. Places like Fresh Paint have huge private collections and help clients loan art. They focus on professional storage, handling, and rotation to keep art safe and fresh.
Storage is more than just a place to keep art. It needs to keep the environment stable. Keeping humidity between 45-55% and temperature at 68-72°F is key to avoid damage. Strong security is also crucial, with alarms, biometric access, and strong vaults.
Handling and moving art needs museum-level care. Every move, from storage to transport, must be done with care. Art handlers use special techniques to avoid damage. This ensures art arrives in perfect condition.
Rotating art is also important. It keeps a space looking new and allows for different themes. A good rotation plan keeps the collection exciting and well-cared for.
The table below shows what a top art storage facility needs. It explains how each part helps avoid damage.
| Storage Component | Technical Standard | Primary Risk Mitigated |
|---|---|---|
| Climate Control System | Maintains 50% ±5% RH, 70°F ±2° | Prevents warping, cracking, and mold |
| Physical Security | 24/7 video surveillance, motion sensors, vault doors | Deters and prevents theft or vandalism |
| Fire Suppression | Inert gas (e.g., FM-200) system, no water sprinklers | Extinguishes fire without water damage to art |
| Inventory & Access Logging | Digital audit trail for all item movements and personnel access | Ensures accountability and chain of custody |
| Packing & Staging Area | Clean, spacious zone with proper lighting and tools | Minimizes handling errors during prep |
Putting all these parts together makes art flow smoothly from storage to display. Keeping humidity right during transport and using insured transport is key. A strict focus on security at every step is the best way to protect art. For serious collectors or museums, this careful work is what keeps a collection alive and vibrant.
Case Rooms: Salon Hang, Masterwork Wall
Two main ways to display art in case rooms are the salon hang and the masterwork wall. These methods turn dining rooms or main suites into gallery-style interiors. They go beyond just decoration, creating a personal connection with the art.
The salon hang takes inspiration from 17th and 18th century European academies. It stacks artworks from floor to ceiling, making a wall full of stories. This setup brings energy and lets different pieces talk to each other.
To pull it off, you need to follow strict rules. These rules help keep the display looking good, even though it’s complex.
- Spacing: Keep the same gap between frames, usually 2 to 4 inches. This makes the display easy to follow without getting too busy.
- Alignment: Pick a main line, either horizontal or vertical. This helps keep the frames in order.
- Thematic Grouping: Group pieces by time, color, medium, or theme. This makes smaller stories within the big display.
The masterwork wall, on the other hand, focuses on one big piece. It grabs all the attention and makes the art stand out. It’s perfect for showing off a collection’s best piece or a large artwork.
Setting up a masterwork wall needs careful thought. The art should be in the center where you first see it. The lighting must be perfect, without glare, and the wall color should match the art. This makes for a truly immersive experience.
Both methods are key to gallery-style interiors in homes. The Serenity project shows a salon hang in a dining room, blending art into everyday life. Larchmont Jewelers has feature walls that show how a single piece can dominate a space. The choice between them depends on the art and the experience you want to create—either a conversation or a moment of wonder.
Spec Pack & Paint Sheen Chart
Creating a successful art-focused interior starts with detailed documentation. This includes a comprehensive spec pack and a paint sheen chart. These documents help turn your vision into clear instructions for the team.
A specification pack is like the project’s blueprint. It outlines every detail, from wall systems to lighting fixtures. It ensures everything works together to protect and showcase the art.
Contractors get all the necessary information from the spec pack. This includes product details and how to install them. This approach helps avoid mistakes and saves time and money.
The paint sheen chart is also crucial. It affects how we see the artwork. Too shiny a finish can make reflections on the canvas distracting.
The right sheen provides a clean background for the art. The chart helps choose from matte to eggshell finishes. But, the surface’s microtexture is even more important.
Microtexture paint is about the feel of the paint after it dries. A rough wall can clash with a painting’s delicate surface. A smooth finish, often from high-end products, makes the wall feel like part of the canvas.
Designers use the sheen chart for both shine and texture. This is key for luxury projects. For more on choosing the right paint, check the architect and designer handbook.
| Sheen Type | Light Reflectance Value (LRV) Range | Recommended Use in Art-Led Design | Microtexture Consideration |
|---|---|---|---|
| Flat/Matte | 0-5 | Primary gallery walls; eliminates all hotspots | Must be ultra-smooth; avoids canvas-like tooth |
| Eggshell | 5-15 | Transitional spaces; gentle wash of light | Low relief; should feel flat to the touch |
| Satin | 15-25 | Not recommended for direct art display | Often has slight stipple; can distract |
| Pearl | 25-35 | Accent walls only, far from artwork | Typically higher texture; use with caution |
The table above gives a starting point for choosing sheen. But, always test samples under the project’s lighting. This is essential.
The spec pack and sheen chart together create a complete plan. They make sure the art is the main focus. This is what makes a design professional and art-focused.
Install Day Checklist
On installation day, moving from design to reality is crucial. A detailed checklist helps avoid mistakes. It ensures the design is perfectly executed, creating a stunning space.
Experts follow a step-by-step plan. Below is a checklist for a smooth installation.
- Pre-Installation Site Verification
- Make sure the area is clean, dust-free, and at the right temperature.
- Test each lighting circuit separately. Check that dimmers and controls work right.
- Look over the walls to see if they’re ready. Make sure blocking and cleats are in place and finished.
- Ensure the room’s humidity and security controls are on.
- Tool & Hardware Confirmation
- Check you have all needed tools: levels, lasers, measuring tapes, and special hanging hardware.
- Make sure you have all the right fasteners, brackets, and security devices for the art.
- Artwork Placement Sequencing
- Put the artworks in a safe place, in the order they’ll be hung.
- Start with the biggest or most central piece to set the room’s balance.
- Follow the layout plan exactly, using temporary markers for guidance.
- Final Leveling & Adjustment
- Use a laser level to align all pieces on their wall systems.
- Make small adjustments to height and spacing. Check your work from a distance often.
- Secure the artworks firmly to their mounts and lock them if needed.
- Lighting System Final Verification
- This step is very important. Turn on all lights, including trimless lights.
- Adjust each light to shine on the center of its artwork.
- Check the light’s spread, color, and how well it shows the art’s colors.
- Make sure trimless lights are flush and don’t show any hardware.
After all art is up, fine-tune the lighting. Aim for even, dramatic light without shadows or hotspots. A final check with the checklist makes sure everything is done right.
This careful process ensures the installation is top-notch. It turns a collection into a stunning, art-focused home.
Results & Collector Insights
A well-done art-led home brings many benefits. It makes the home look and feel better. The art’s value and cultural importance grow too.
Collectors feel a deep sense of joy. Living with art changes their daily life. It inspires and touches their heart every day.
Keeping the art safe is key. This ensures its beauty and value last. Regular checks and updated insurance are important steps.
The home becomes a story of the collector’s life. It’s a place for new art to join. This makes the home a living, growing part of their story.